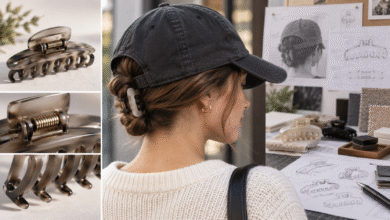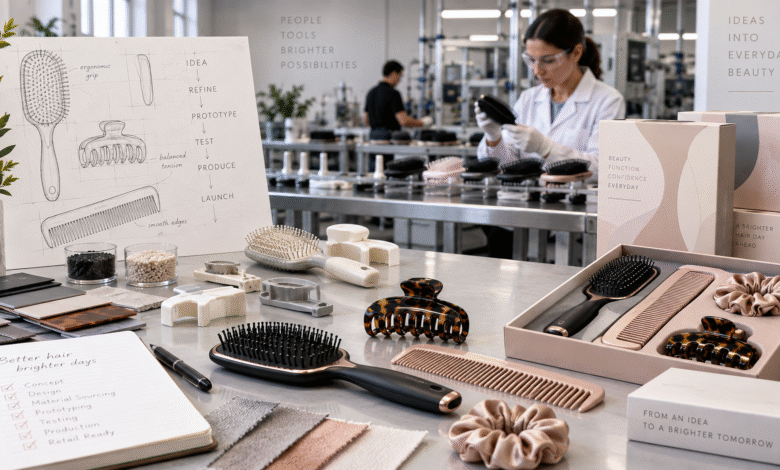
A successful hair tool rarely begins with a finished technical drawing. It usually starts with a much simpler idea: a brush that detangles with less pulling, a comb that performs reliably under salon heat, or a styling accessory designed for a specific retail audience. Turning that idea into a product that can be manufactured consistently, packaged efficiently and sold with confidence requires far more than choosing a shape and colour.
Hair tool manufacturing is a coordinated process involving product definition, material selection, engineering, tooling, sampling, testing, quality control and production planning. Every stage affects the next. A decision that looks minor during concept development, such as changing handle thickness or bristle density, can influence tooling cost, product weight, assembly speed and packaging dimensions.
Understanding this process helps brands communicate more clearly with a professional hair tool manufacturer, compare quotations accurately and avoid expensive changes after tooling has already begun.
1. The Process Starts With a Clear Product Brief
Manufacturers need more than a reference photo and a request for a similar product. A useful product brief explains what the tool must do, who will use it and how it should be positioned in the market.
For example, a detangling brush intended for thick, curly hair requires different pin flexibility, spacing and handle control from a finishing brush designed for straight hair. A salon comb used near heated appliances needs different material properties from an inexpensive promotional comb. A claw clip intended for dense hair needs a different spring force and tooth geometry from a small decorative clip.
A practical brief should define:
- Target user: consumer, salon professional, barber or specialist stylist.
- Primary function: detangling, smoothing, sectioning, blow-drying, straightening or securing hair.
- Hair type: fine, thick, straight, curly, coily, wet or dry.
- Price position: entry level, mid-market, professional or premium.
- Sales channel: salon, beauty retailer, supermarket, e-commerce or promotional programme.
- Customisation level: existing mould, modified design or fully custom product.
- Target market: the countries in which the finished product will be sold.
The clearer these points are at the beginning, the easier it is for the manufacturer to recommend suitable materials, construction methods and testing requirements.
2. Product Positioning Must Become a Technical Specification
Marketing language is useful for describing the customer benefit, but it must be translated into measurable product requirements before production. Terms such as “premium,” “flexible,” “heat resistant” or “strong hold” can mean different things to different teams.
A manufacturer converts those claims into specifications. “Flexible pins” may become a defined pin diameter, length and bending range. “Strong hold” may become a target spring force and tooth engagement depth. “Heat resistant” may require a specific polymer grade and a documented test temperature.
This translation prevents a common sourcing problem: the brand and supplier agree on a product description but imagine different performance levels. A written specification creates a shared reference for sampling, approval and final inspection.
3. Material Selection Balances Performance, Cost and Production
Hair brushes, combs and accessories use a wide range of plastics, metals, natural materials, coatings and composite components. The best choice depends on the function of each part rather than on a single material being universally superior.
ABS is widely used for rigid bodies and handles because it offers a practical balance of strength, surface quality and mouldability. Polypropylene may be selected when greater flexibility or lower weight is needed. Nylon is common for pins and bristles because its stiffness can be adjusted through grade, diameter and geometry. Cellulose acetate supports premium colour depth and polished finishes, but its production process and cost differ from standard injection-moulded plastic.
Metal may be needed for springs, pins, heated components or reinforcement. Wood can support a natural product position, although moisture control, surface finishing and dimensional consistency require careful management.
Material decisions also affect colour matching, decoration, recycling claims, chemical resistance and compliance documentation. A responsible manufacturer should be able to explain why a proposed material suits the intended use instead of recommending it only because it is already available.
4. Design for Manufacturing Prevents Avoidable Problems
A product can look attractive in a rendering but still be difficult to mould, assemble or inspect. Design for manufacturing, often called DFM, adapts the concept so it can be produced repeatedly without losing the original functional intent.
Engineers review wall thickness, draft angles, parting lines, undercuts, fastening points and assembly tolerances. They also examine how the product will leave the mould, how components will be joined and where cosmetic marks may appear.
For a brush handle, uneven wall thickness can cause sink marks or warping. For a comb, incorrect tooth geometry can create weak points or rough edges. For a claw clip, poorly balanced tooth spacing or hinge alignment can reduce holding performance even if the product looks correct when closed.
DFM is most effective before tooling begins. Changes made at the digital design stage are relatively inexpensive. The same changes become slower and more costly once steel moulds have been cut.
5. Prototypes and Samples Answer Different Questions
Not every prototype represents the final production process. Early prototypes are often used to confirm dimensions, ergonomics and overall appearance. They may be 3D printed, machined or assembled from temporary components.
A pre-production sample goes further. It should use the intended materials, moulding process, assembly method, decoration and packaging wherever possible. This sample helps both parties evaluate whether the approved concept can be reproduced under real manufacturing conditions.
Sample evaluation should be structured rather than based only on general appearance. Useful review points include:
- Overall dimensions and weight
- Handle comfort and balance
- Tooth, pin or bristle spacing
- Surface finish and edge smoothness
- Colour consistency
- Logo size and placement
- Moving-part alignment
- Packaging fit and protection
- Performance on the intended hair type
Feedback should be specific. “The handle feels wrong” is difficult to act on, while “increase the centre width by 3 mm and soften the lower edge” gives the engineering team a clear direction.
6. Tooling Connects the Approved Design to Mass Production
Custom plastic products usually require injection moulds. Tooling cost depends on product size, cavity count, surface texture, part complexity, steel grade and expected production life. A low quotation is not automatically the best value if the mould cannot hold dimensions consistently or requires frequent repair.
Brands should confirm who owns the tooling, where it will be stored, how maintenance is handled and whether future modifications are possible. They should also understand whether the quoted mould supports a single cavity or multiple cavities, because cavity count influences output speed and unit economics.
After tooling is completed, trial production identifies issues such as warping, flash, incomplete filling, visible weld lines or difficult ejection. The first moulded sample is rarely treated as an automatic approval. It is part of an adjustment process that continues until both appearance and function meet the agreed standard.
7. Testing Must Reflect Real Use
Testing should be based on how the product will actually be used, transported and cleaned. A visual inspection alone cannot confirm whether a product will remain reliable over time.
Depending on the product, manufacturers may test bending, drop resistance, pull strength, spring cycling, bristle retention, heat exposure, chemical resistance or colour adhesion. Packaging may require vibration, compression or drop testing to check whether the product arrives without scratches, broken teeth or deformation.
Electrical tools add another level of testing. Temperature stability, insulation, cord durability, switch life and market-specific electrical safety requirements must be considered. The required certification route depends on the destination market and product classification, so it should be discussed before final design approval rather than after production.
8. Branding and Packaging Are Part of Product Engineering
Logos can be moulded, printed, laser marked, foil stamped or applied through labels and metal badges. Each method has different cost, durability, minimum-order and design limitations. A very fine logo may not reproduce clearly through moulded embossing, while a large printed area may require a specific surface finish for reliable adhesion.
Packaging also affects production. Card dimensions, insert design, barcode position, warning text and carton quantity influence assembly labour and shipping efficiency. Oversized packaging can increase freight cost, while packaging that is too tight may bend bristles or scratch polished surfaces.
For this reason, packaging should be tested with the actual product sample. Treating packaging as a separate task at the end can create last-minute fit problems and delay production.
9. Production Planning Depends on More Than MOQ
Minimum order quantity is important, but it should not be the only number discussed. Brands also need to understand sample lead time, tooling lead time, production capacity, component availability and packaging schedules.
A factory may mould the main body internally but source springs, bristles, magnets, printed boxes or electrical components from specialist suppliers. The longest component lead time can determine the final production schedule. Seasonal demand, public holidays and peak retail periods can also affect capacity.
A realistic timeline normally includes:
- Product brief and quotation
- Design confirmation
- Prototype or existing-product sample
- Tooling and mould trials
- Pre-production sample approval
- Material and packaging preparation
- Mass production and assembly
- Inspection
- Packing and shipment
Skipping approval stages may appear to save time, but it increases the risk of discovering specification differences after a full batch has been produced.
10. Quality Control Should Follow the Product Through Production
Final inspection is important, but quality control works best when it begins before the finished goods stage. Incoming materials, moulded parts, assembly and packaging should each have defined checkpoints.
| Production Stage | Typical Checks | Purpose |
| Incoming materials | Grade, colour, dimensions | Prevent incorrect inputs |
| Moulding | Flash, warping, fill, finish | Control part consistency |
| Assembly | Alignment, force, retention | Confirm function |
| Decoration | Position, adhesion, colour | Protect brand appearance |
| Final packing | Quantity, barcode, protection | Ensure shipment accuracy |
An approved reference sample and written inspection criteria help buyers and factory teams judge the batch using the same standard. Photos, measurements and test records provide stronger evidence than broad statements that the goods have been checked.
11. Choosing the Right Manufacturing Partner
The right partner is not simply the factory offering the lowest unit price. Product-category experience, engineering communication, sampling discipline and quality systems all affect the real cost of development.
Brands should ask whether the supplier has produced similar structures, which processes are completed in-house, how subcontracted components are controlled and who is responsible for technical communication. They should also review how clearly the quotation separates tooling, product, decoration, packaging and testing costs.
A supplier’s development process should match the project’s complexity. A simple logo change on an existing brush does not need the same engineering programme as a fully custom electrical styling tool. Brands planning a custom range can review a structured approach to OEM and ODM hair tool development when comparing the stages and support they expect from a manufacturing partner.
Conclusion
Turning a hair tool idea into a retail-ready product is a chain of connected decisions. The product brief defines the user and function. Engineering converts those goals into dimensions and materials. Tooling makes repeatable production possible. Sampling, testing and quality control confirm that the product performs as intended, while packaging and production planning prepare it for the market.
Brands that treat manufacturing as a collaborative development process are better positioned to control cost, reduce delays and protect product consistency. The most effective supplier relationship is built on clear specifications, measurable approval standards and early communication about the decisions that matter most.