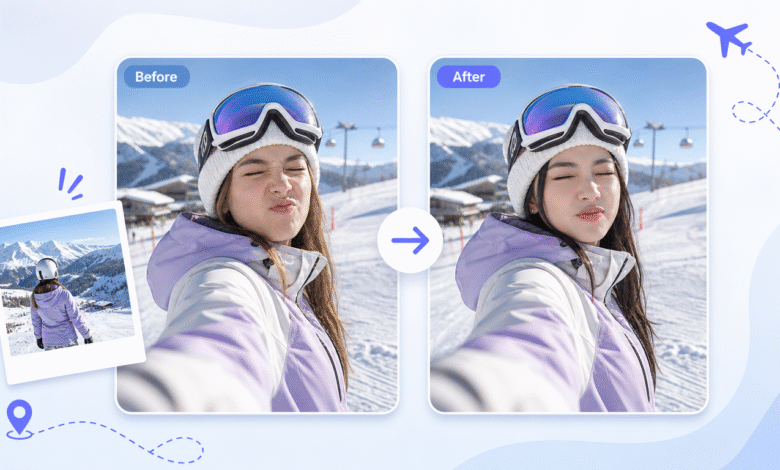
AI video face swaps can look sharp in one clip and strange in the next. I’ve tested this across phone footage, webcam recordings, and short social videos, and the same pattern keeps showing up: the tool matters, but the source material matters more. A good platform like EasyFaceSwap can only work with the face detail, lighting, angle, and motion you give it.
The biggest quality problems usually come from blur, poor lighting, low resolution, blocked faces, and heavy head movement. If you want cleaner results from a Video Face Swap, think like a camera operator before you think like an editor. The better your input video and source face, the less the AI has to guess.
Why AI Face Swap Quality Breaks Down
AI face swapping works by reading facial landmarks, matching expressions, and blending the new face into each video frame. When the face turns too far, moves too fast, falls into shadow, or gets covered by hair or hands, the model has fewer clear points to track. That’s when you start seeing flicker, soft edges, odd skin tones, or a face that feels pasted on.
In my own tests, the most reliable clips were not the fanciest ones. They were simple videos with steady light, a clear front facing face, and natural expressions. A clean 720p clip often beat a noisy 4K clip shot in bad indoor light. Resolution helps, but clarity helps more.
The Top 8 Ways to Improve AI Video Face Swap Quality
| Rank | Quality Fix | Biggest Impact |
|---|---|---|
| 1 | Use a clear source face | Better identity match |
| 2 | Choose high quality video | Sharper frame detail |
| 3 | Match face angles | Less warping |
| 4 | Improve lighting | Cleaner skin blending |
| 5 | Reduce motion blur | More stable tracking |
| 6 | Avoid blocked faces | Fewer broken frames |
| 7 | Keep expressions natural | Better mouth and eye sync |
| 8 | Export with care | Less final compression damage |
1. Use a clear, high quality source face. Overview: this is the single biggest factor in a convincing face swap. The AI needs a sharp, well lit image of the face you want to use, preferably looking straight ahead or only slightly angled. Key features of a good source image include visible eyes, nose, mouth, jawline, and forehead, with no sunglasses, masks, heavy shadows, or extreme filters.
The pros are clear: a better source face gives you stronger identity, cleaner skin texture, and fewer strange blends around the mouth and eyes. The trade off is that not every favorite selfie works well, especially if it’s cropped tight or taken in low light. Best for: any project where likeness matters, such as social clips, character tests, or creator content. If I can choose only one thing to fix before running a swap, I start here.
2. Choose the cleanest target video you can. Overview: the target video is the clip receiving the swapped face, and it controls much of the final realism. A crisp video with stable focus gives the AI more facial detail from frame to frame. Key features to look for are decent resolution, low noise, steady focus, and a face that stays large enough in the frame.
The upside is that a clean target video reduces flicker and makes the final result look less processed. The downside is file size, because better video can take longer to upload, process, and export. Best for: talking head clips, product videos, short ads, and any video where the face stays visible for more than a second or two. A blurry clip rarely becomes sharp after a swap, so don’t expect the AI to repair bad footage for free.
3. Match the face angle between source and video. Overview: face angle matters because the AI has to map one face shape onto another. If your source face looks straight at the camera but the person in the video is in a hard side profile, the result may stretch or flatten. Key features of a strong angle match include similar head direction, similar camera height, and a close match in how much of each cheek is visible.
The benefit is a much more natural face shape, especially around the nose, chin, and jaw. The trade off is that you may need to test more than one source image to find the right match. Best for: clips with head turns, acting shots, dance videos, and scenes where the subject isn’t looking straight into the camera. When I’m working with a profile heavy video, I try to use a source image with at least a slight turn instead of a perfect passport style photo.
4. Improve lighting before you process the video. Overview: lighting affects face detection, skin color, and edge blending. Soft, even light gives the AI a clean read of the face, while harsh shadows make parts of the face disappear. Key features of better lighting include visible eyes, no deep shadow across one side of the face, and a skin tone that doesn’t shift wildly between frames.
The pro is that better lighting makes the swap feel more attached to the scene. It also helps reduce the waxy or mask like look that shows up in dark clips. The con is that you can’t fully fix bad lighting after the fact, especially if the face is underexposed or blown out. Best for: indoor creator videos, webcam clips, and phone footage shot at night. I’ve had better results moving a subject near a window than trying to rescue a dim clip later.
5. Reduce fast movement and motion blur. Overview: AI face swaps work best when the face is easy to track from one frame to the next. Fast head turns, shaky camera movement, and low shutter speed blur can break that tracking. Key features of a cleaner motion clip include slower head movement, a stable camera, and enough light for the camera to capture a sharp face.
The main advantage is stability. You’ll see fewer frame jumps, less flicker around the eyes, and a cleaner outline along the cheeks and hairline. The trade off is creative freedom, because some action heavy clips simply won’t swap as cleanly as slower videos. Best for: interviews, reaction clips, tutorials, and social posts where the subject speaks directly to the camera. If a clip has one fast head turn, trimming that moment can improve the whole result.
6. Avoid hair, hands, props, and objects blocking the face. Overview: blocked faces confuse the AI because it can’t always tell what should stay in front and what should be replaced. Hair across the eyes, a hand over the mouth, a microphone near the chin, or glasses glare can all create rough frames. Key features of a good target video include a clear face outline and minimal objects crossing the eyes, nose, and lips.
The pro is fewer obvious glitches, especially during speech. The con is that real videos are messy, and you may not be able to remove every obstruction. Best for: beauty clips, podcast videos, training content, and clips with close framing. In my tests, hands crossing the mouth caused more visible problems than almost anything else because the mouth area already changes quickly during speech.
7. Keep expressions natural and not too extreme. Overview: expression matching is one of the hardest parts of video face swapping. A small smile, blink, or normal speaking movement is usually fine, but wide open mouths, exaggerated laughs, and squinting can push the model too far. Key features of a better expression match include relaxed eyes, natural speech, and mouth shapes that don’t change too fast.
The benefit is better lip area blending and fewer odd teeth or mouth artifacts. The trade off is that very emotional clips may lose quality unless the source face and target video are both excellent. Best for: spokesperson videos, memes with mild expressions, educational content, and simple entertainment clips. If you need a dramatic performance, test a short section first before processing a full video.
8. Export and compress the final video carefully. Overview: even a good face swap can look worse after a bad export. Heavy compression softens the face, adds blocky noise, and can make small blend errors more visible. Key features of a clean export include using a common format like MP4, keeping a reasonable bitrate, and avoiding repeated reuploads between apps.
The pro is that careful export protects the work you already did. The con is that higher quality files are larger and may take longer to share. Best for: final social posts, client previews, YouTube Shorts, TikTok style edits, and any file that will be uploaded again. I try not to download, edit, send, and reupload the same clip five times, because each pass can chip away at sharpness.
Comparison Summary
If you’re trying to improve a poor result, don’t change everything at once. Start with the source face and target video because they set the quality ceiling. If those are weak, later fixes like better export settings won’t save the clip.
After that, look at angle, lighting, and motion. These three decide how stable the face looks while the video plays. A still frame might look fine, but video quality is judged in motion, and that’s where tracking errors stand out.
Blocked faces and extreme expressions are more situational, but they can ruin otherwise good footage. If the clip has hair across the eyes or a hand passing over the mouth, expect some rough frames. Sometimes the smartest fix is choosing a cleaner section of the same video instead of forcing the entire clip to work.
Export quality comes last because it protects the final result rather than creating it. It won’t fix a bad swap, but it can stop a good one from looking soft or noisy after upload. For social platforms, I usually keep a clean master file and then create platform ready versions from that file.
Final Recommendation
For the best AI video face swap quality, begin with a sharp source face, a clean target video, and a close match in face angle. Then check lighting, motion, obstructions, and expressions before you process the full clip. These steps sound basic, but they make the biggest difference because they help the AI track and blend the face with less guessing.
My practical advice is to test five to ten seconds first. Use that short sample to spot flicker, skin tone issues, mouth glitches, or edge problems. If the sample looks good, the full video has a much better chance of working. If it looks bad, fix the input rather than hoping a longer render will improve it.